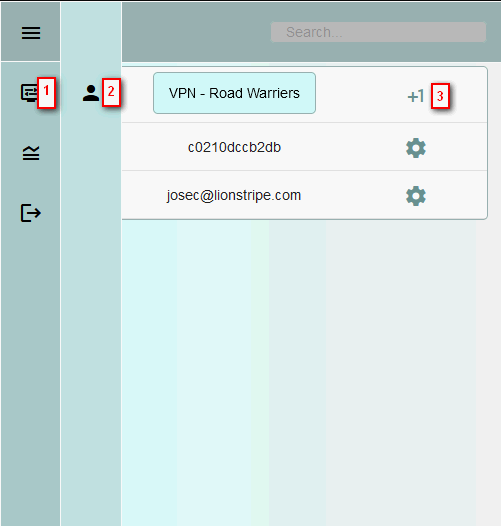
Adding a VPN supplicant to your system is easy. Just access the VPN road warrior list page and click the +1 (step 3):
This will present you with a page allowing you to enter the details of the new supplicant:
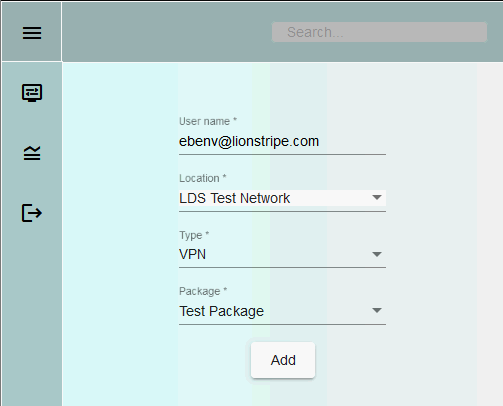
Username: can only be an email address for VPN users. This page will also allow you to enter a MAC address because it is the generic "add supplicant page", however for VPN users only email addresses are valid.
Location: Is the network you want to give the user access to.
Type: The type of access you are providing, in this case select "VPN"
Package: This menu populates once the type has been selected. The package defines what access the user is given once connected.
Click Add to complete. If the Supplicant exists and / or is already mapped to the package the system will not duplicate the access, you will simply be redirected to the existing mapping page:
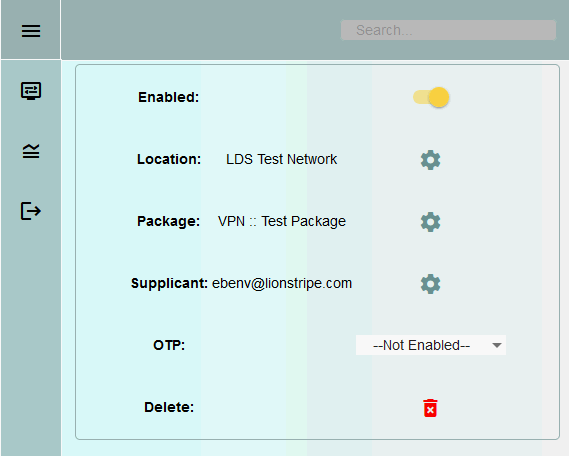
The mapping details page:
Enabled: Allows you to enable / disable the mapping if you need to temporarily cut off access but you do not want to delete the mapping.
Location: Nothing yet, will point to the location details page in the future.
Package: Nothing yet, will point to the package details page in the future.
Supplicant: Access the supplicant details page, listing all the mappings for this user.
OTP: Select an OTP profile to enforce on authentication (Click for details).
Delete: Permanently remove this mapping (requires confirmation).
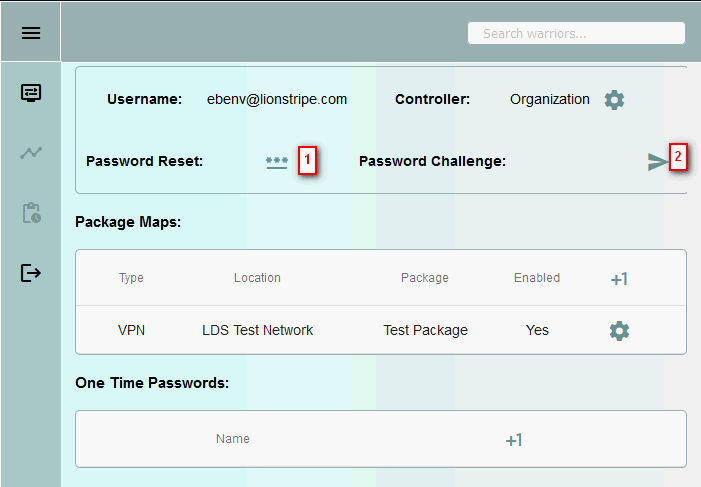
Supplicant password.
By default new supplicants are not sent a password challenge. Currently the only way they can get a password by accessing the supplicant page and clicking "Password reset" or "Password Challenge" (both require confirmation).
1) Password reset: Provides the admin with a newly generate password on their clipboard. The old password is replaced immediately.
2) Password challenge: Sends an email to the user asking them to reset their password via a link. The link expires after 1 day. The old password is replaced once they complete the challenge successfully.